One of the most painful things we see all too often, is a homemade video that looks homemade. If it weren’t for all the distractions of low quality, we’d be able to focus on the informative content! Most people recognize the importance of video for marketing and personal sharing. If you want to allow your message to have its full impact, here are six simple tips for making sure your DIY lighting is helping and not hindering.
First let’s cover some basics.
For a video, you need three essential elements: a video recording device (like your phone), sound, and lighting. If you have an actual camera-great! Set up a tripod or hold it stable to reduce shaking. If you use a smart phone-same thing. Set it on selfie mode, but place it on a stand or brace your arm to reduce the bobbles. If you plan on using the in-camera mic, try to eliminate any background noise. You may also want to get closer to the camera so that your audience can actually hear you. With both camera and sound, you are typically stuck with the quality of your recording device unless you make an additional purchase.
Now onto lighting.
Lighting is the aspect of recording that you do have some control over!

1. One big mistake people often make is with backlighting. The view might be pretty out your window, but the camera can’t pick up the bright scene behind you and the subject in the foreground. Turn on lights, but keep the main light in front of you so that you are highlighted.
(The bright background caused a silhouette. If we were to look from the opposite direction, the outdoor light would nicely illuminate the scene.)
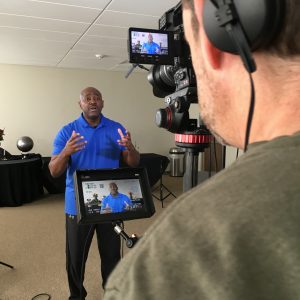
 2. Cameras can struggle adjusting the white balance if there is a mixture of indoor and outdoor lighting. If you can’t adjust your camera, you can help it by using one type of lighting.
(The big windows in the dentist office illuminated the scene, so the harsh overhead lights were turned off.)

3. Whether you use a studio light or an office lamp, adjust the angle and intensity so that you do not create harsh shadows on your face. Be as picky as Goldilocks: not too bright, not too dark. You may have to move things around to have the right amount of light on your face, but it is worth it.
(A window cast strong shadows on the young women’s faces. If they faced the window they would have been evenly lit – and limited the yellow-green indoor lighting.)
4. Background does affect lighting. Just like windows can be too bright behind the subject, plain white walls are less than ideal. They are flat and boring, and don’t have that sharp look like studio-produced whites.
(Having something in the background – but blurred by the depth of field – creates interest and avoids walls that are either too bright or dull colored.)
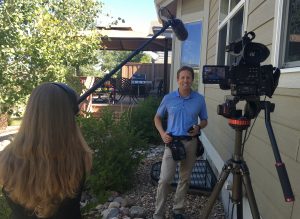 5. If you are outside, try to find even lighting. Avoid the harsh midday sun or shooting in partial shade (like under a tree where sunlight through the leaves creates a dappled effect).
(The shade from the house provided even lighting so that nothing on screen was too bright or hidden by shadows.)
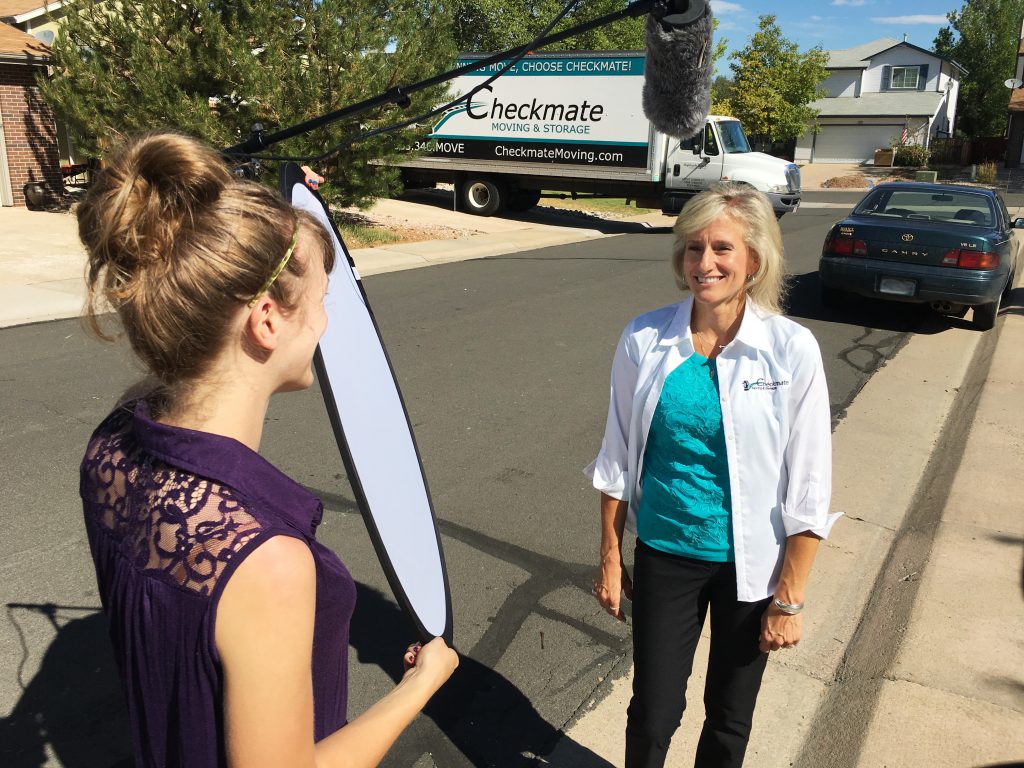 6. You can add a pop of light and even out shadows on the subject while filming outside by using a reflector. Don’t have a reflector? Even an automobile sun reflector or white paper can help!
(In the bright sunlight, the reflector filled in the shadows on her face, causing her to look evenly lit and smooth features.)
Now to get started.
Lighting is just one aspect of filming that can make or break your video. Continue learning more about things like where to place your subject in the screen, depth of field, more lighting techniques, and mics for better sound quality. With some new skills and techniques and just a few upgrades, you can avoid simple mistakes and set your DIY videos up for better success!
